Important Keyword: E-ITR, Income Tax e-Filing, ITR Filing.
Table of Contents
What is JSON Utility?
In the onset of the Financial Year 2021-22, the Central Board of Direct Taxes (CBDT) has ushered in a new era by introducing JSON Utilities for the filing of Income Tax Returns (ITR). With this move, the Income Tax Department has chosen to phase out the existing Excel and Java versions of the ITR Utilities, effective from the Financial Year 2020-21/Assessment Year 2021-22.
What Data is available in the Prefilled JSON?
The prefilled data imported into the Income Tax Return (ITR) form can be modified for basic information such as address, name, and bank details, among others. However, it’s important to note that PAN details cannot be altered. If any changes are required for the PAN, you’ll need to update the information on the e-filing portal and then download the prefilled JSON file again. Here’s a breakdown of the details present in the prefilled JSON file:
- Prefill Taxpayer Information: This section includes essential details such as the assessee’s name, contact information, residential status, date of birth, taxpayer category, PAN, and Aadhaar details.
- Prefill Bank Account: It contains information about your pre-validated bank account.
- Prefill Income Details: This section includes various sources of income, such as salary, income from house property, and other sources.
- Prefill Tax Credits: It comprises details of Tax Deducted at Source (TDS), Tax Collected at Source (TCS), self-assessment tax, and advance tax.
- Prefill Brought Forward Losses: This part includes any losses from house property, capital gains, or business and profession that were reported when filing the ITR within the due date in the previous year.
Step-by-Step Guide to Download JSON Offline Utility
- Visit the Income Tax e-Filing Portal
Go to the Income Tax e-Filing Portal
- Downloads
Now, click on Downloads > Income Tax Returns from the dashboard
- Download the Common Utility
Select the assessment year and click on the option to download the common utility
- Open the ITR Utility Folder
After the Zip Folder is downloaded, open the Utility from that folder, and if you receive a message asking to ‘Run Anyway’ the program, click on ‘Run Anyway’
- The utility will start installing
After you select ‘Run Anyway’ your ITR Utility will start installing
- Now, click on Continue
After you install the utility you land on the Homepage. Now Click on continue.
- File your ITR
From here you will be able to file your Income Tax Return for AY 2023-24
Download Prefilled JSON
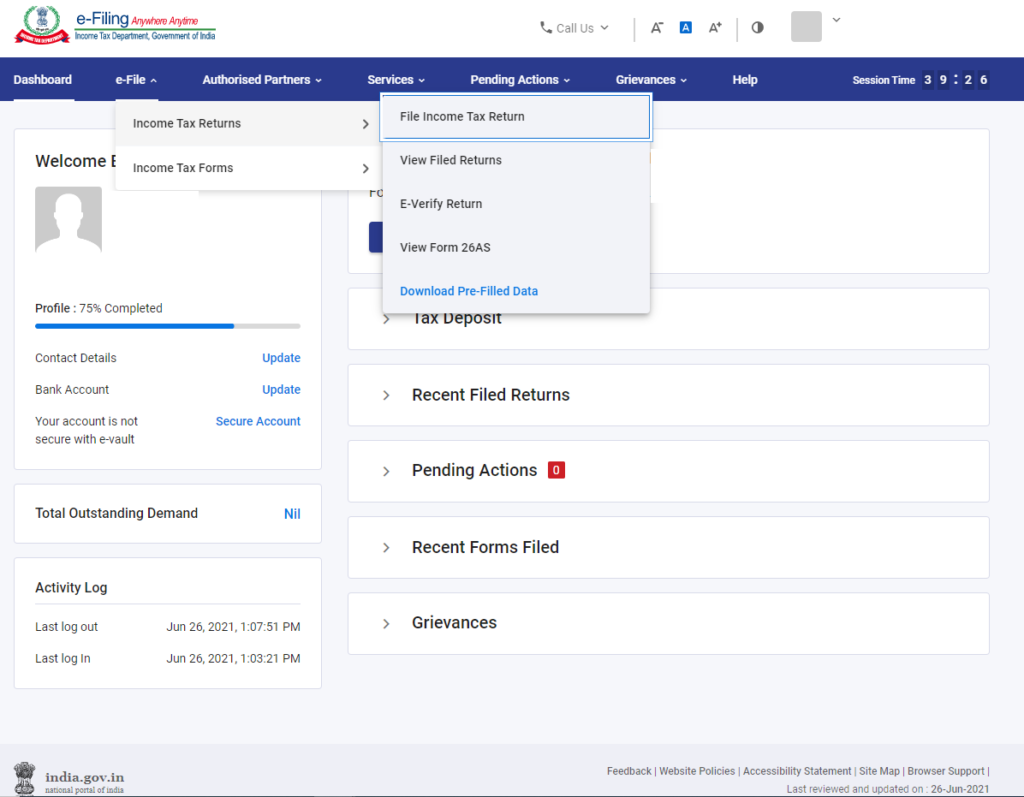
- Login to the www.incometax.gov.in and click on e-File > Income Tax Returns > Download Pre-Filled Data
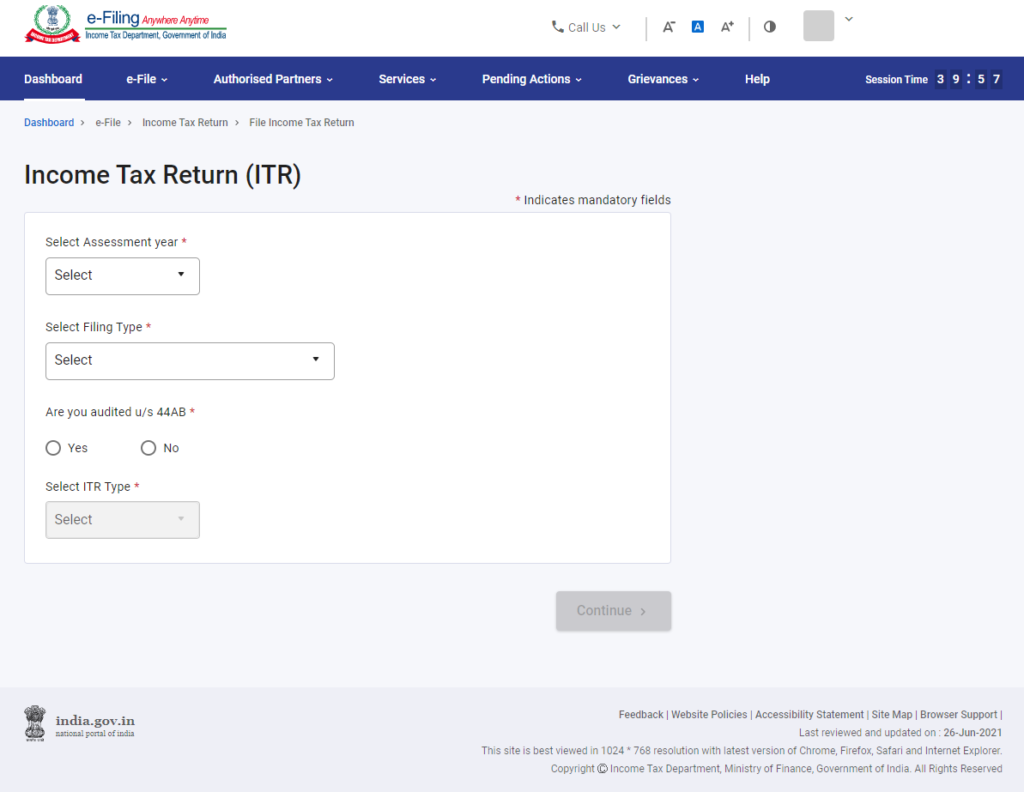
- Next, enter the details such as assessment year and click on continue.
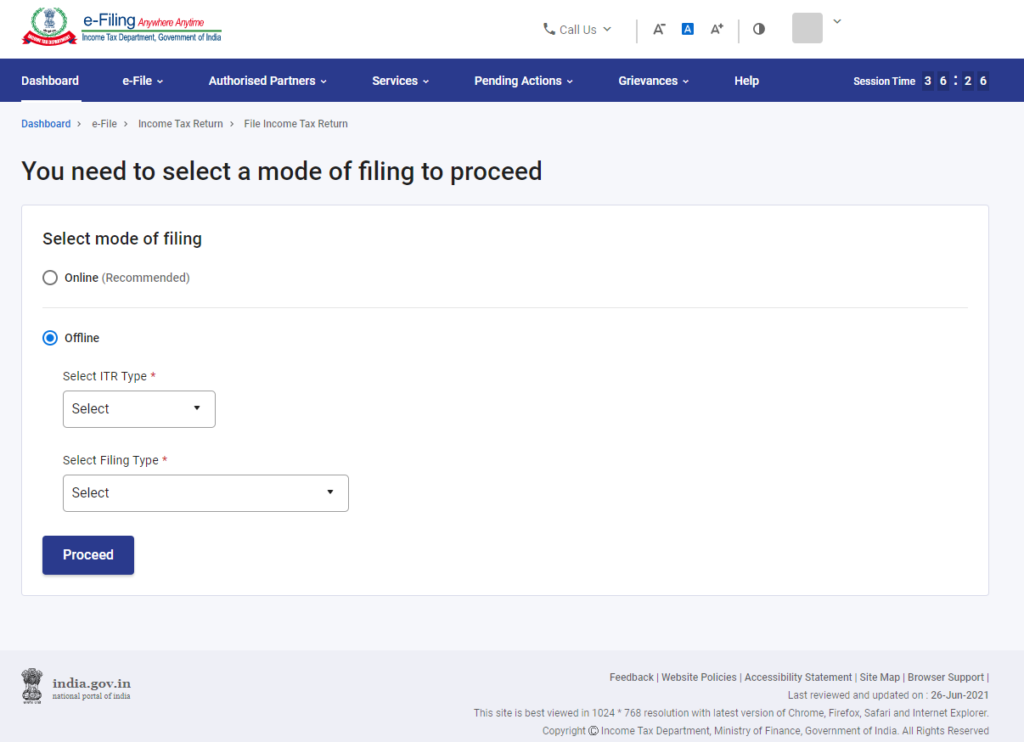
- Select the mode of filing as offline. You will be asked to select the ITR type and Filing type. Choose the appropriate options and click on proceed.
- Finally, click on the option to download the prefilled data.
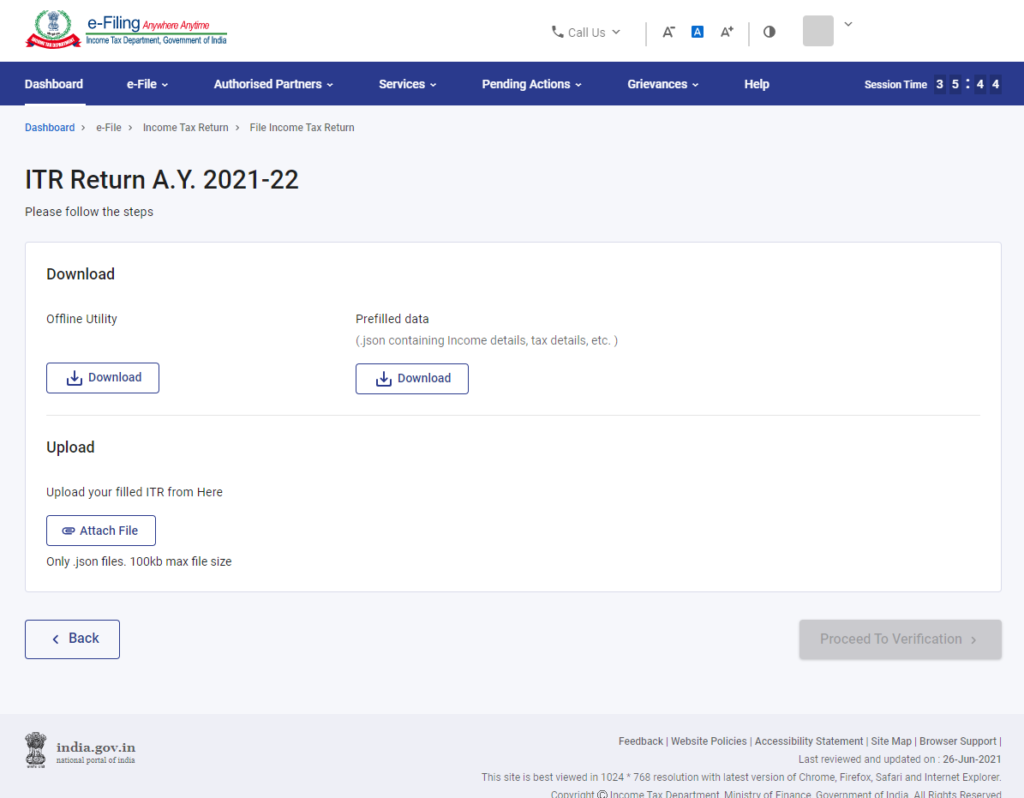
You can attach this file to the income tax JSON utility you downloaded to file your ITR.
How to File ITR Using JSON?
After preparing your ITR, you need to upload the prepared ITR JSON file on the e-Filing portal by following these steps:
- Visit the e-Filing Portal and login using valid credentials.
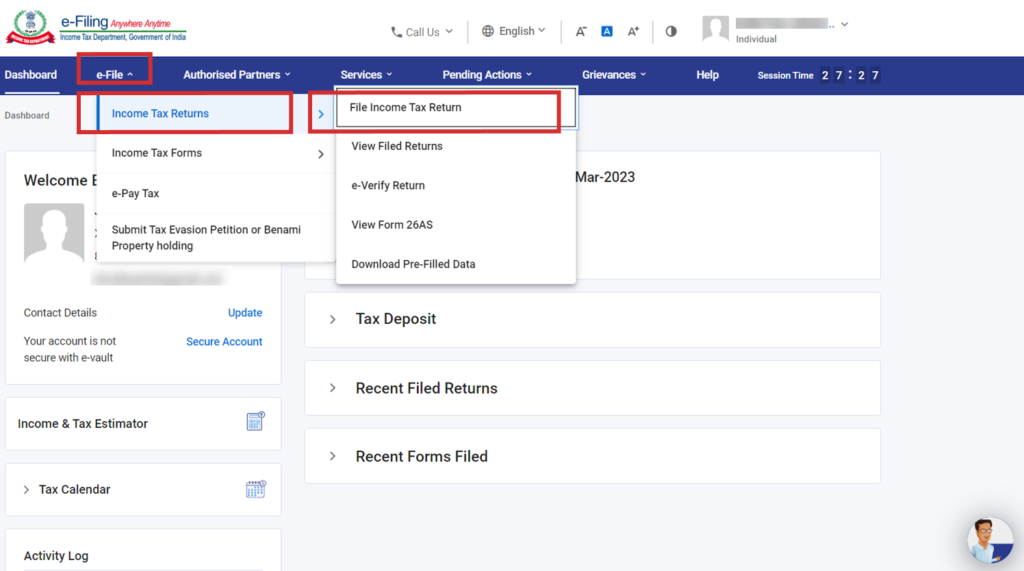
- Click on the e-File > Income Tax Returns > File Income Tax Return from the dashboard
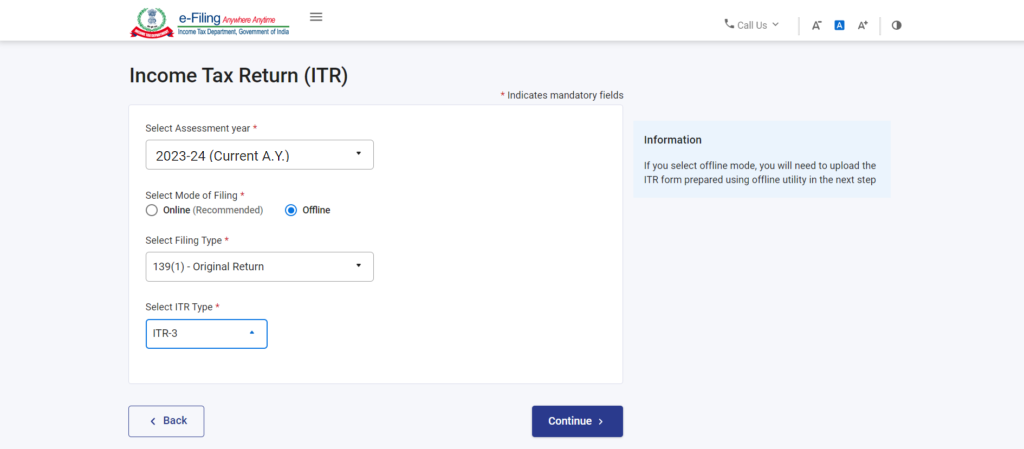
- In order to file the return using the JSON file, the taxpayer needs to select the mode of filing as offline.
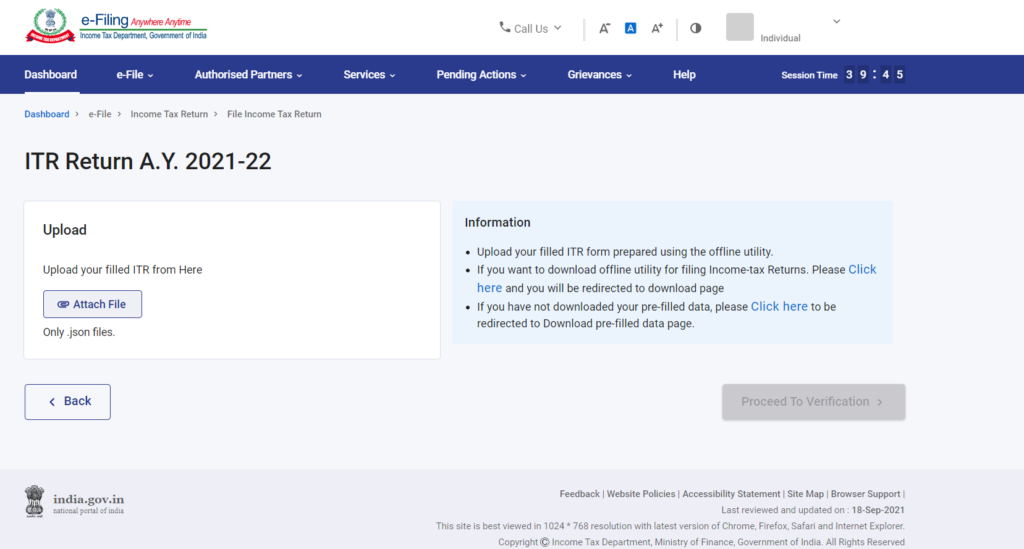
- Attach the JSON file
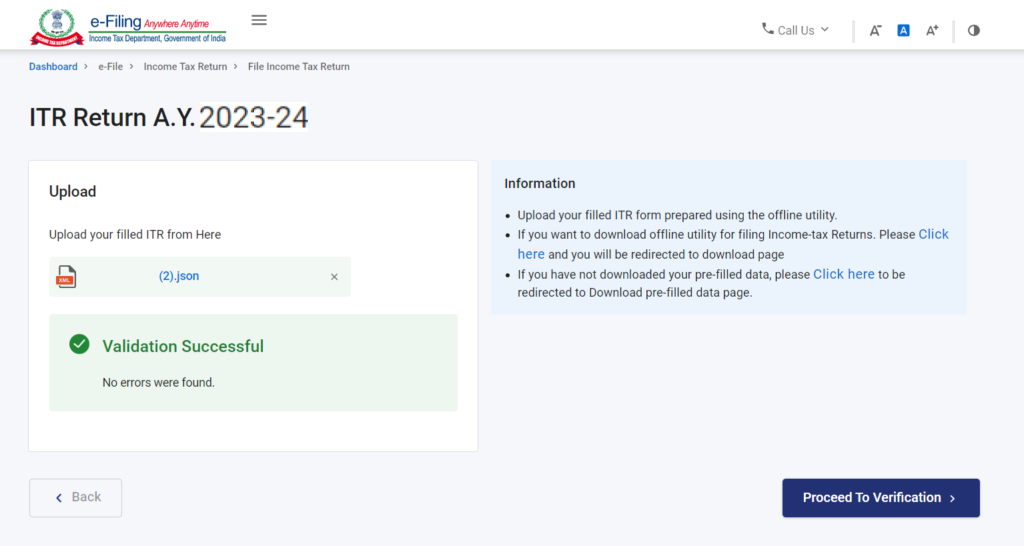
- In case there are no errors, the next screen would show you the message “Successful Validation“. Next, click on the “Proceed to Validation” option.
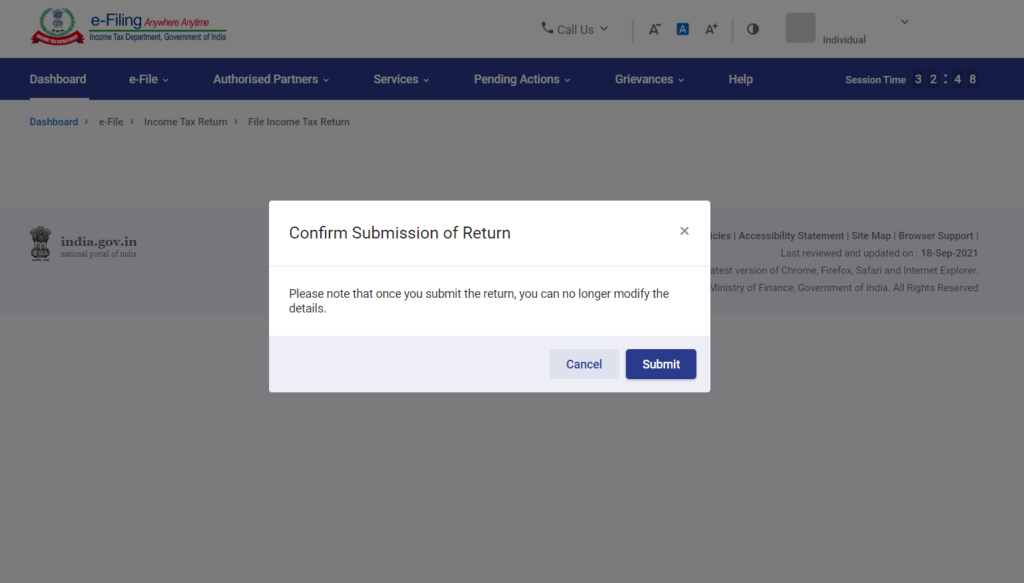
- Confirm the submission of the income tax return.
- Finally, you would receive the success message displaying the successful submission of the ITR. You will also receive an email along with the acknowledgment number and the ITR-V on the registered email ID.
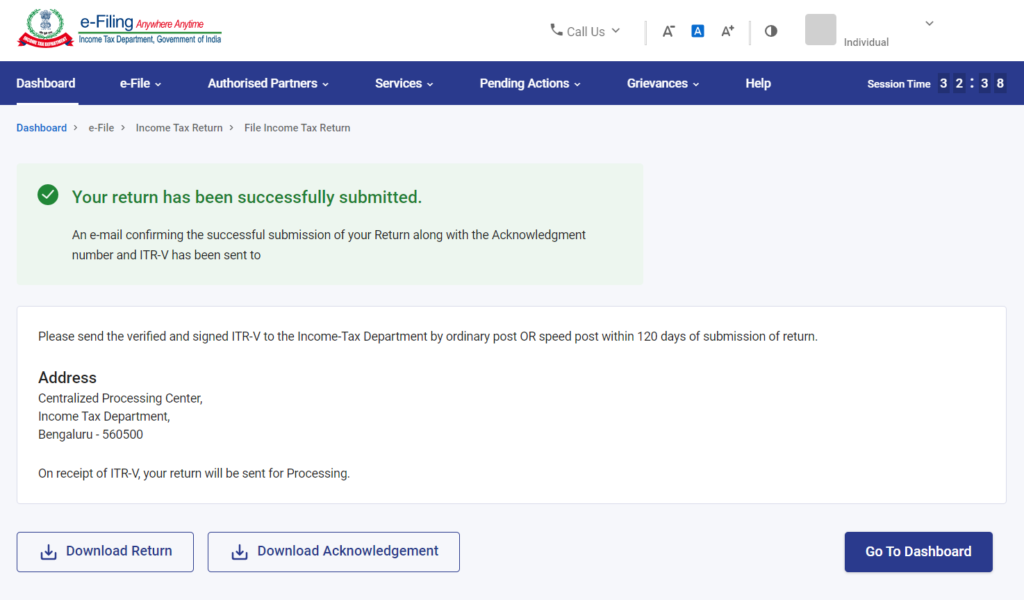
Submitting the ITR to the ITD is not the last step of the process. You still have to e-Verify your return within 30 days of the submission of your return.
Read More: How to Generate EVC on the e-Filing Portal?
Web Stories: How to Generate EVC on the e-Filing Portal?
Official Income Tax Return filing website: https://incometaxindia.gov.in/


